

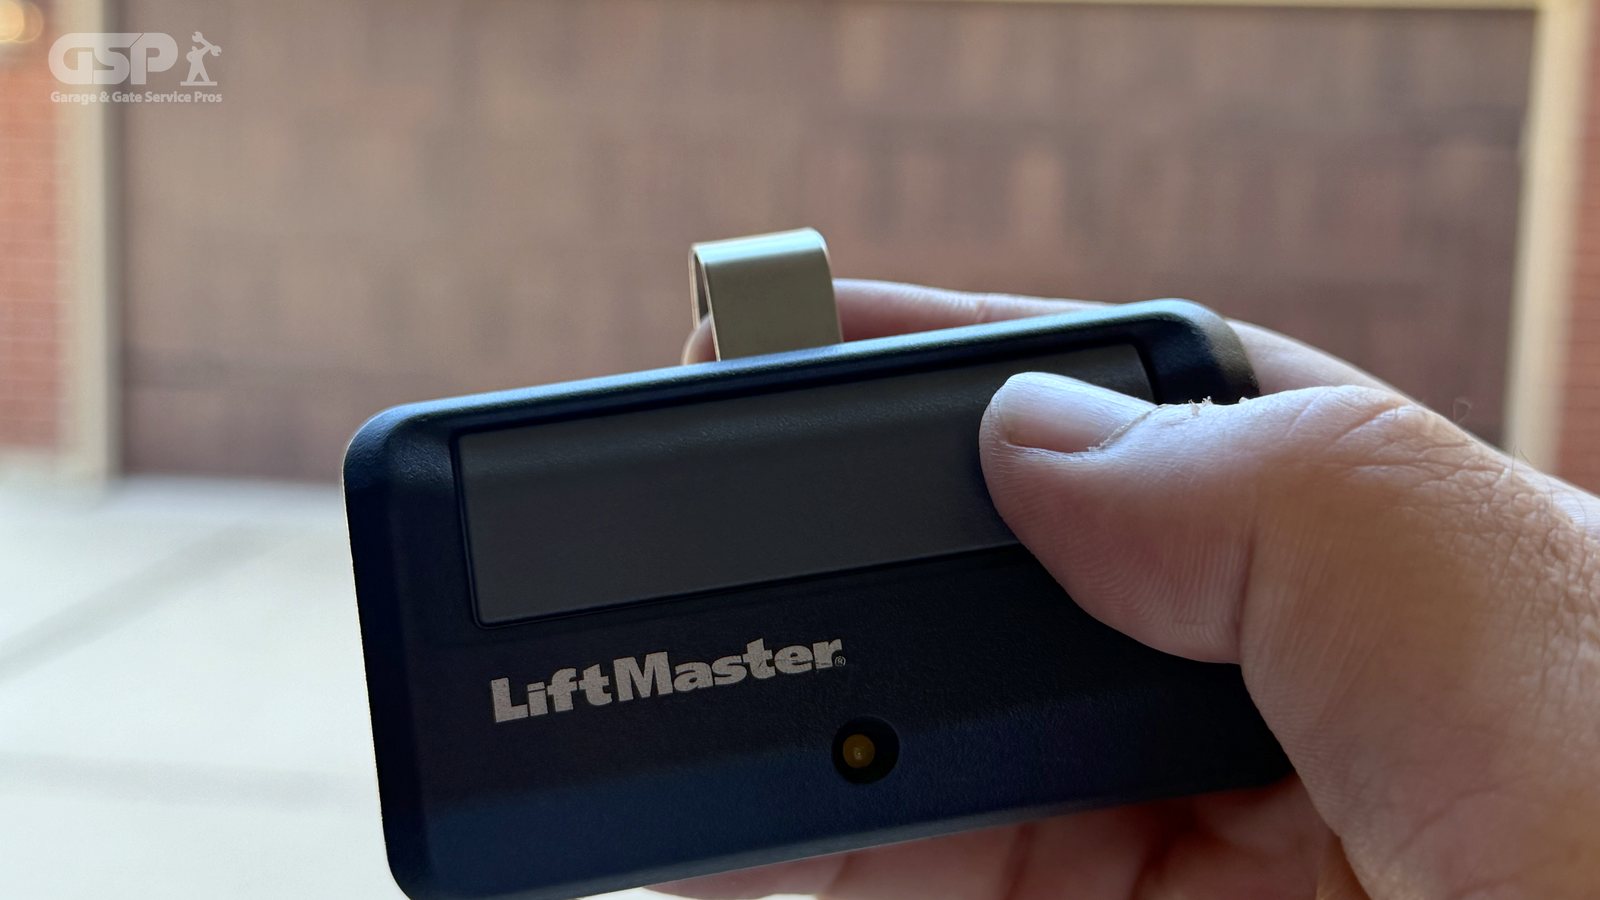
Remote not opening the garage door? Most of the time the fix is one of four quick checks you can do yourself.
You press the remote and nothing happens. Maybe the keypad by the garage door quit too, or just one remote stopped working. Before you assume the opener is shot, take ten minutes and run through this guide. A lot of the remote and keypad calls we get turn out to be something a homeowner can fix in a few minutes: a lock setting that got bumped, a remote that is out of range, a dead battery, or a remote that lost its programming.
This is the guide our office sends callers to. The steps below come from Chamberlain and LiftMaster support pages and owner’s manuals, and the photos were taken on a LiftMaster opener with myQ and a LiftMaster keypad, so you can see exactly what to look for. Work through it from the top. If you get to the end and it still is not working, give us a call.
First, does the wall button still work?
The wall button inside your garage is wired to the opener. Your remotes and keypad talk to the opener wirelessly. That is why one can quit while the other keeps working, and it is the best clue you have.
- Wall button works, remotes or keypad do not: the motor and door are fine. The problem is the signal, so start with the quick checks below.
- Only one remote quit: walk closer and try it, then give it a new battery. If it still will not work, it needs to be programmed again.
- Only the keypad quit: check the lock button, then go to step 3 for the keypad battery and step 4 for the PIN.
- Nothing works, not even the wall button: this guide will not fix that. Check that the opener has power, and if it does, skip to the section on when to call a technician.
The quick-check order
Work through these four checks in this order. Each one takes a couple of minutes, and the first two cost nothing.
- Check the lock button on the wall control.
- Walk closer with the remote to rule out a range issue.
- Replace the battery in the remote and/or keypad.
- Reprogram the remotes and/or keypad by finding the learn button and following the steps.
One more question before you start: did this remote ever work with this opener? If it is a new remote or one that came with the house, it may not be programmed, or it may not be compatible with your opener at all. Step 4 shows you how to tell.
1. Check the lock button
Many LiftMaster wall controls have a LOCK button, sometimes called vacation mode. When lock is on, the opener ignores your remotes. The wall control still works, and on LiftMaster’s 880LMW and 882LMW wall controls the keypad still works too. It is off from the factory, but it is easy to turn on by accident with an elbow or a box.
Signs lock mode is on:
- The command LED on the wall control keeps blinking.
- The opener lights flash twice when you press the remote.
To turn it off: press and hold the LOCK button for about 2 seconds, until the LED stops flashing or turns solid. Then try your remote again.
If you are stuck outside and the remote is the only way in, go in through another door and turn lock off at the wall control. If you have to open the door by hand, read our guide on manually releasing and reengaging your garage door with the opener first.
2. Walk closer with the remote to rule out a range issue
Stand right under the opener and press the remote. Then back up and try again from farther away. Chamberlain puts normal range at about 2 to 3 car lengths. If the remote works up close but not from the driveway, you have a range problem, not a dead opener. Work through this list in order:
- Take the remote off the visor and try it again.
- Keep a weak battery in mind. It is one of the most common reasons a remote only works up close, and swapping it is step 3.
- Check the opener’s antenna wire. It should hang straight down from the motor unit, not be bent up or tucked away.
- Think about what is around the opener. Metal buildings and metal walls can block the signal. Chamberlain sells an antenna extender kit (041A3504) for that.
- Look at the light bulbs in or near the opener. Some LED bulbs interfere with the signal (more on that below).
- Check what else is plugged into the same outlet, like phone chargers or a garage fridge.
- Look for other openers nearby, such as a neighbor’s.
If the remote does nothing even when you are standing right under the opener, move on to the battery in step 3.
Chamberlain also lists shorted wall control wiring as a cause. Their test is to disconnect the wall control wires (red and white) at the opener, never the safety sensor wires, and try the remote. If you are not comfortable working with the wires on your opener, leave that one for a technician.
LED bulbs can block your remote
This one surprises a lot of people. Some LED bulbs put out interference that can make the remote work only up close, make the remote or keypad close the door but not open it, or keep the remote from programming at all. Chamberlain recommends A19 incandescent or CFL bulbs, or their tested LED bulb (CHLED1), and says to avoid halogen, short-neck and over-wattage bulbs. Easy test: take the LED bulbs out of the opener, then try the remote.
3. Replace the battery in the remote and/or keypad
A weak battery is one of the most common reasons a remote or keypad quits, and it is also the usual reason a remote only works when you are right in front of the garage, like you tested in step 2. Batteries are cheap, so swap it even if you are not sure it is dead.
Remote batteries
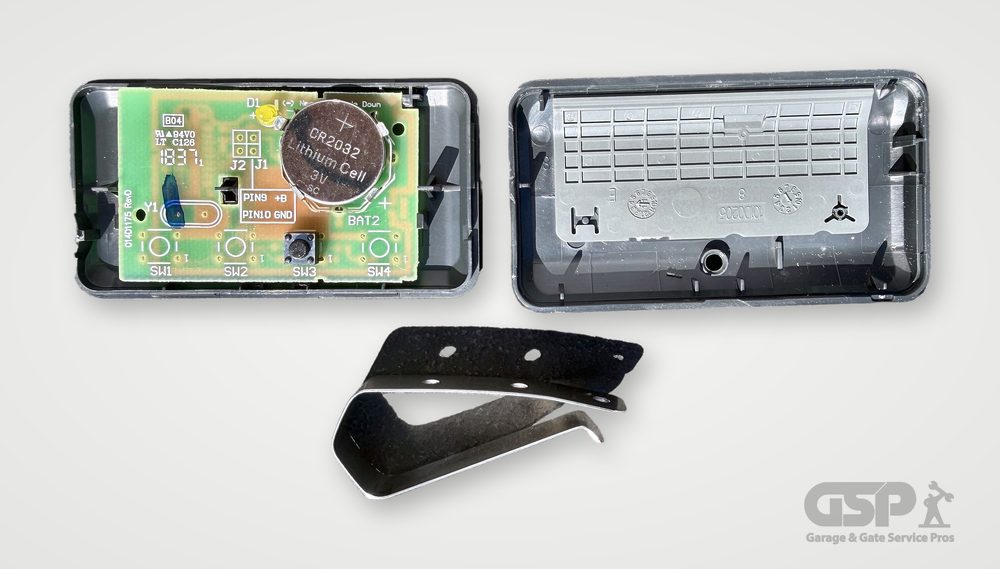
Most LiftMaster remotes use a 3V CR2032 coin battery like this one. Match the plus side the same way the old battery came out.
Most LiftMaster remotes use a 3V CR2032 coin battery. A few use something else. The LiftMaster 895MAX takes a CR2016, and some remotes, like the LiftMaster 894LT, take a AAA. Open the case and look at the battery that is in there now, then buy the same one.
To change a remote battery:
- Open the case. On the LiftMaster 893MAX, Chamberlain shows prying the case apart with the visor clip.
- Note which way the old battery faces. On the 893MAX the new battery goes in with the positive (+) side up.
- Look at the metal contacts. If you see corrosion, clean it off gently.
- Put the new battery in, snap the case closed, and test the remote.
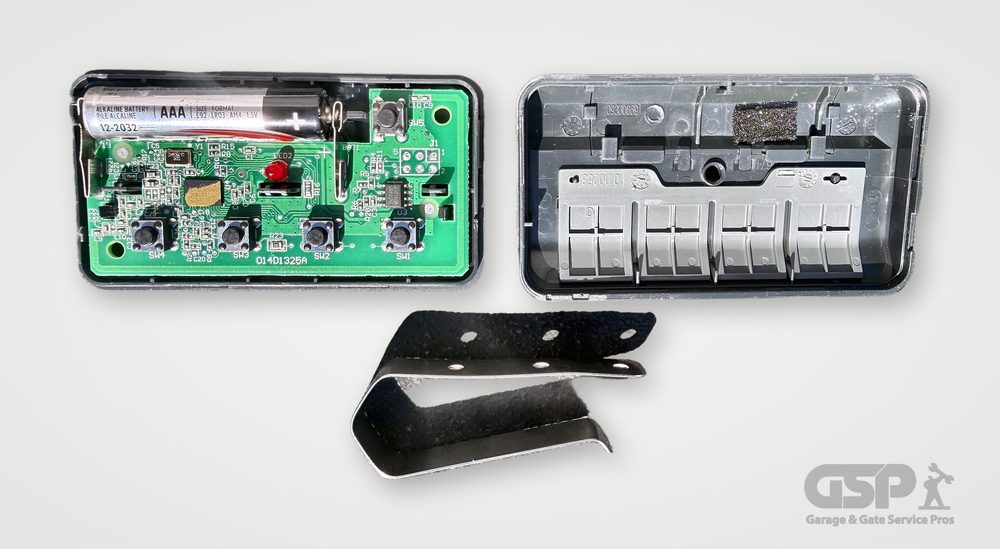
Some remotes take a AAA battery instead. Open the case and check before you buy a replacement.
On LiftMaster MAX remotes, a low battery shows up as the remote’s LED not flashing when you press a button. In Chamberlain’s troubleshooting order, the battery comes before reprogramming, and you only reprogram if the remote still does not work. Test it with the new battery before you move on to step 4.
Keypad batteries
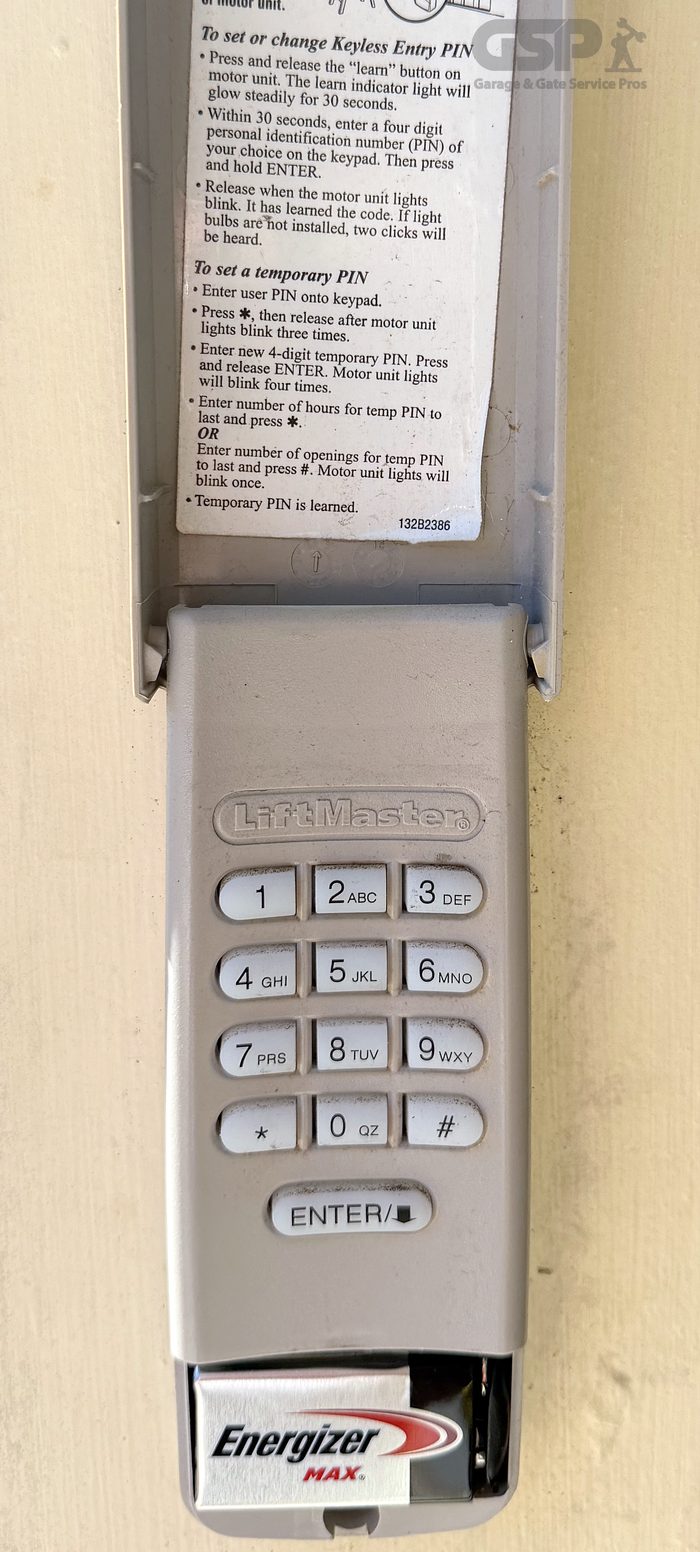
A LiftMaster wireless keypad with the cover open. The 9V battery sits at the bottom, and the label inside the cover shows how to set or change the PIN.
LiftMaster wireless keypads, like the 877MAX, 878MAX and 877LM, use a 9V battery. Chamberlain notes that some older models may use a 12-volt battery. If the keypad is dim or does not light up when you press it, replace the battery. Keypads sit outside in the Houston heat and humidity all year, so they go through batteries.
To change a keypad battery (877 and 878 style):
- Put a flat screwdriver into the oval cutout at the bottom of the keypad.
- Slide the battery cover down.
- Replace the 9V battery.
- Slide the cover back up and test the keypad.
Chamberlain says a keypad may need to be programmed again after a battery change. If it still does not work with a fresh battery, set the PIN again using the keypad steps in step 4.
4. Reprogram the remotes and/or keypad with the learn button
If lock is off, the remote does not work even up close, and the battery is fresh, the remote or keypad may have lost its programming. It only takes a few steps, but you will need a step stool or ladder to reach the opener. Start by finding the learn button, then follow the steps for your remote or your keypad.
Find the learn button
The learn button is on the motor unit that hangs from your garage ceiling, on the same side where the wall control and safety sensor wires connect. It is usually just above where the antenna wire hangs down. On some models it is behind the light lens or a cover.
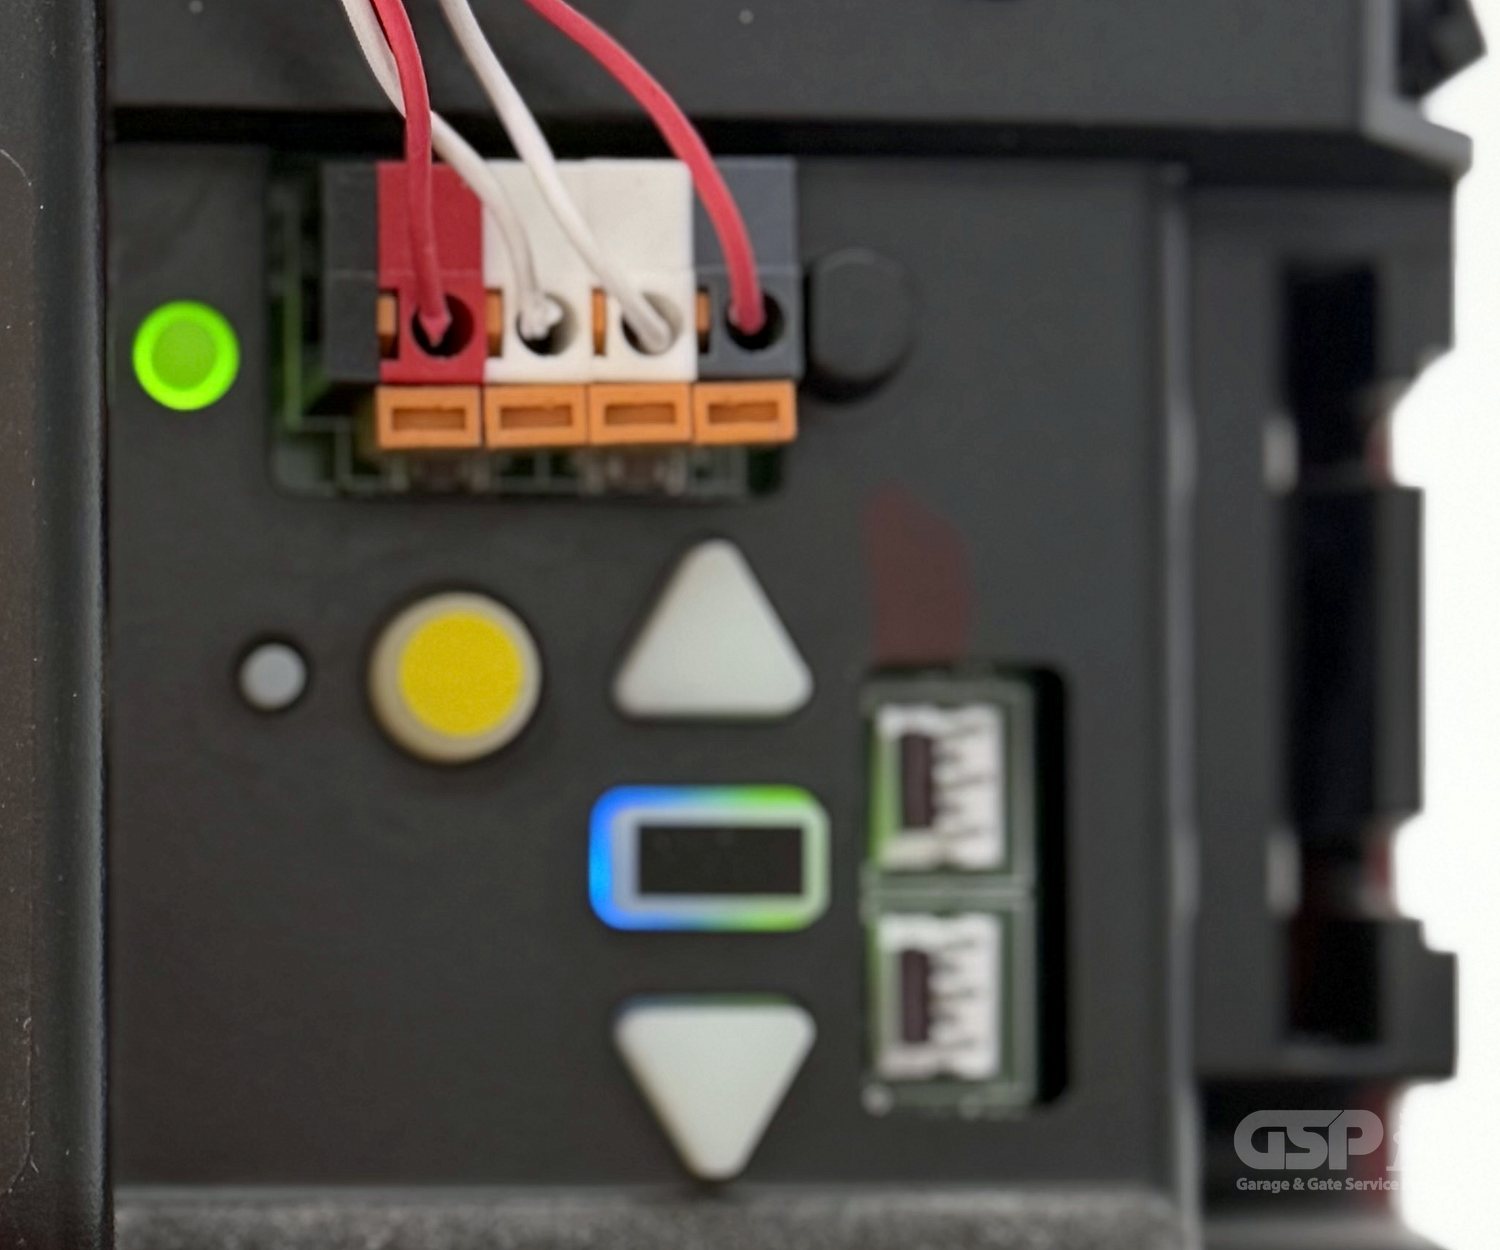
The learn button on this opener is the round yellow button below the wire terminals. Its color tells you which remotes work with the opener.
What the learn button color means
On LiftMaster openers (and Chamberlain and Craftsman openers built by the same company), the color of the learn button tells you which radio technology the opener uses. That decides which remotes and keypads will work with it. Here is Chamberlain’s chart:
| Learn button color | Technology | About when |
|---|---|---|
| Yellow (square), white or gray | DIP switch | Before 1993, no longer supported |
| Green | Billion Code, 390 MHz | 1993 to 1997, universal remotes only |
| Red or orange | Security+, 390 MHz | 1997 to 2004 |
| Purple or brown | Security+, 315 MHz | 2005 to 2014 |
| Yellow (round) | Security+ 2.0 | 2011 to 2022 |
| Yellow with “Step Saver Set Up” label | Security+ 2.0 | 2022 to 2025 |
| White (round) | Security+ 3.0, Bluetooth | 2025 to present |
Red buttons can fade to look orange, and purple can fade to look brown. Chamberlain also has a learn button color guide with photos. Check the color before you buy a replacement or universal remote, and make sure the package lists your color.
How to program a remote at the opener
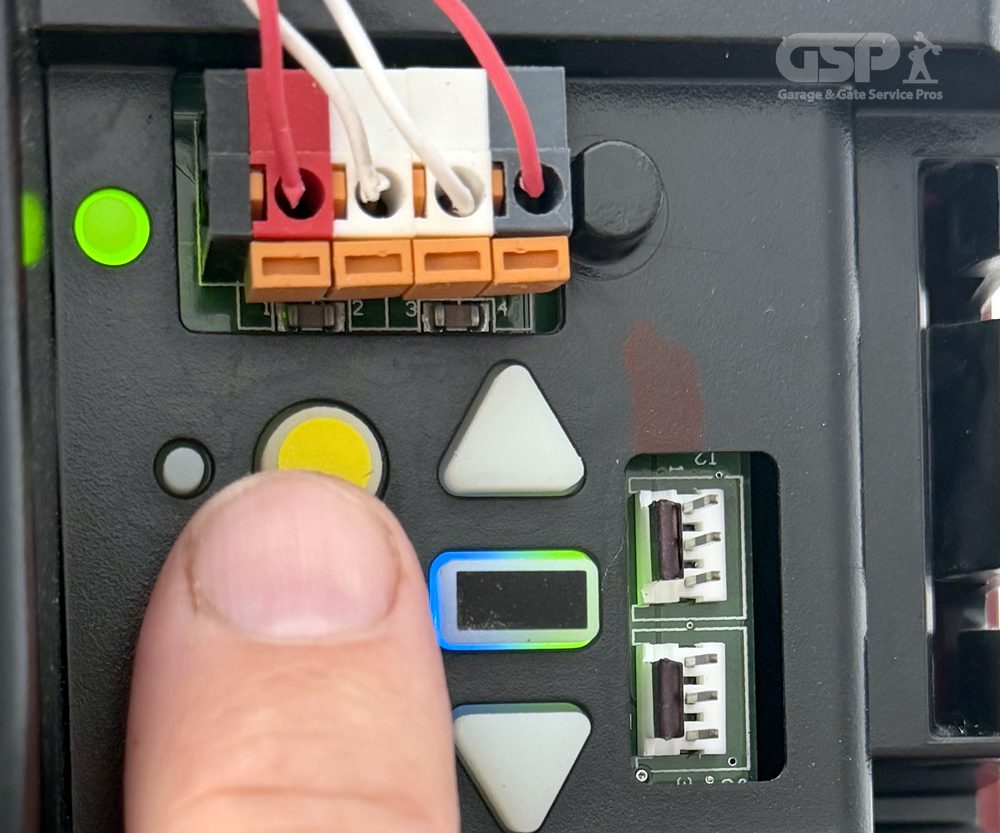
Tap the learn button and let go. Holding it too long erases every remote and keypad from the opener’s memory.
This method works for every learn button color on LiftMaster openers.
- Press and release the learn button right away. Do not hold it. The learn LED will glow steadily.
- Within 30 seconds, press and hold the remote button you want to use.
- Let go when the opener lights flash or you hear two clicks.
- Test the remote.
Important: tap the learn button, do not hold it. Holding it too long erases the opener’s memory, and then every remote and keypad has to be programmed again. If you get no lights or clicks, make sure you tapped and did not hold, and make sure the remote is compatible with your learn button color.
Other ways to program a remote
- From the wall control: if your wall control has its own learn button (like the 880LMW or 882LMW), press its learn button twice, then press the remote button within 30 seconds. On the 880LMW screen, you can also go to PROGRAM, then REMOTE, and follow the prompts.
- Wall-mount openers: models with no learn button on the motor, like the 8500 and RJO20, use the learn button on the myQ Control Panel. See our page on wall-mount garage door openers in Houston if you are not sure what you have.
- The myQ app: if your opener has a yellow or white learn button and a Wi-Fi or “Powered by myQ” logo, you can add a remote in the app: Settings, then Devices, then Add, then Accessory, then Garage Door Remote.
- MAX remotes (893MAX, 890MAX): hold the remote’s program button until its LED lights. Press the button you want to program 1 time for a yellow learn button, 2 for purple, 3 for red or orange, or 4 for green. Then tap learn on the opener, press the remote button until the lights flash or you hear two clicks, and press a different button to finish.
- Car buttons: Chamberlain sends built-in car buttons to HomeLink.com for the steps.
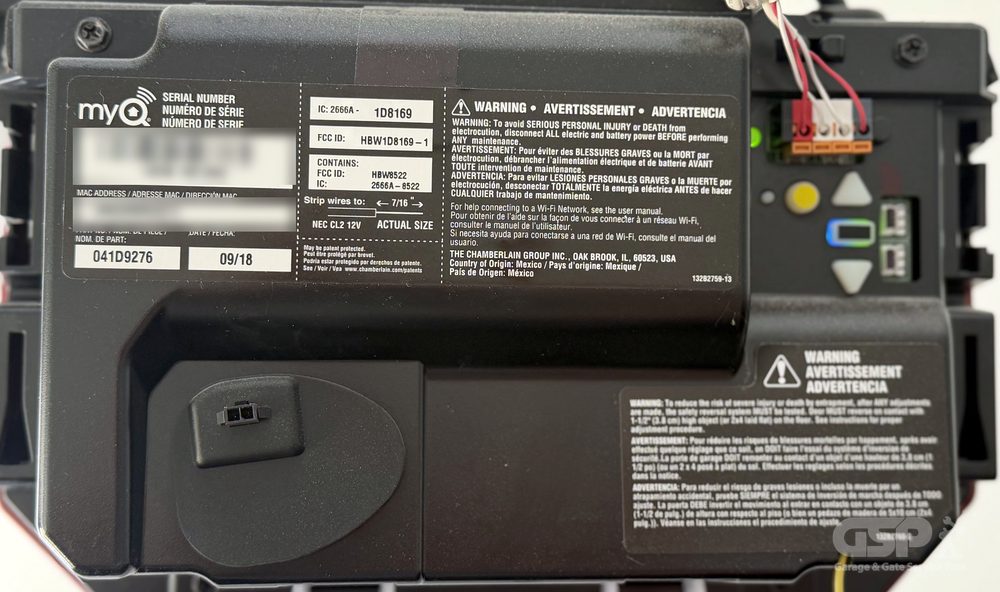
A myQ logo on your opener means you can add a remote through the myQ app. (We blurred the serial number on this one.)
White learn button (2025 and newer): these Security+ 3.0 openers are new. Use the myQ app, or follow the owner’s manual for your model.
How to program the keypad (set or reset the PIN)
If the keypad lights up but the door does not move, set the PIN again. These steps are for LiftMaster wireless keypads like the 877MAX, 877LM and 878MAX.
Set a new PIN at the opener (you do not need the old one):
- Press and release the learn button on the opener. You have 30 seconds.
- On the keypad, enter a 4-digit PIN.
- Press and hold ENTER until the opener light blinks.
If your wall control has a learn button, you can press it twice instead, then enter the PIN on the keypad and press ENTER.
Change your PIN from the keypad:
- Enter your current PIN.
- Press and hold the # button until the opener light blinks twice.
- Enter the new PIN and press ENTER. The light blinks once when it takes.
Temporary PIN for guests or contractors: enter your PIN, then hold * until the opener light blinks 3 times. Enter the temporary 4-digit PIN and press ENTER (the light blinks 4 times). Then enter a number of hours and press *, or a number of openings and press #, up to 255 either way. To clear it, repeat the steps and set it to 0. Temporary PINs are not available on green-button openers.
Keypad problems and what they mean
- It closes the door but will not open it: an expired temporary PIN can still close the door. Chamberlain’s fix is to clear the memory and reprogram. A non-compatible LED bulb can cause this too.
- One number seems dead: program a completely different PIN. If the new one works, one button has worn out. Use a PIN without that digit or replace the keypad.
- It works sometimes: take the keypad off the wall and test it in your hand. If it works off the wall, the mounting surface may be interfering. Chamberlain suggests rubber grommets or mounting it on a small piece of wood.
Lost a remote or moved into a new home? Erase them all
If a remote was lost or stolen, or you just bought the house, erase every remote and keypad from the opener and start fresh. Have the remotes you are keeping and your new keypad PIN ready, because you will program each one again afterward.
- Press and hold the learn button for about 6 seconds, until the learn LED goes out.
- All remotes and keyless entry keypads are now erased.
- On yellow-button openers, to remove myQ accessories too, hold learn again for 6 seconds within 3 seconds of the LED going out.
- Program your remotes and keypad again using step 4 above.
Unplugging the opener does not erase the remotes, no matter how long it stays unplugged. For a new home, Chamberlain suggests a factory reset of the opener, which clears remotes, keypads and myQ devices.
Genie or Linear opener?
Genie: on newer Genie openers, hold the program button until the round LED turns blue, then let go (the long LED flashes purple). On 1995 to 2011 models, press and release Learn Code once. Then, within about 30 seconds and standing at least 5 feet away, slowly press the remote button twice. Genie says no reprogramming is needed after a battery change on its GL2T remote.
Linear: on the Linear LDCO800, the learn window is only about 15 seconds, not 30. Press LEARN, then press the remote. One flash means the remote was added. Four flashes means it was already stored and has now been removed.
When it is time to call a technician
You have done the checks. Here are the signs the problem is inside the opener, not the remote:
- The learn LED flashes fast and constantly. The opener is getting a constant signal, usually from a stuck remote button. Pull the batteries from each remote to find the one causing it. If it keeps flashing with every battery out, call us.
- The door opens or closes by itself, even with the wall control wires disconnected. Chamberlain says the receiver logic board needs to be replaced.
- A keypad still fails after a fresh battery and a new PIN.
- No remote works, even after you erase the memory and reprogram.
- You have a green learn button. Chamberlain says replacement receiver boards for those openers are no longer available.
- Nothing works, not even the wall button.
When the receiver or the opener itself is the problem, garage door opener repair is the next step. If the opener is old and parts are gone, it may be time to look at a new one. Our guides on choosing the right garage door opener and whether LiftMaster is the best garage door opener walk through the options, and you can see the models we work on most on our LiftMaster garage door openers page.
If the remote works but the door goes back up when it closes, that is usually the safety sensors, not the remote. See why your garage door won’t close and our guide to aligning the safety eyes. For other problems, start with troubleshooting common garage door problems.
If the door is stuck open, will not close, or you heard a loud bang, stop pressing buttons. That can be a broken spring or cable, not the remote. See our emergency garage door repair page.
Common questions about garage door remotes and keypads
Why does the wall button work but not my remote?
The wall button is wired to the opener and the remote is wireless. Check the lock button first, then walk closer to rule out range, then replace the battery, then reprogram with the learn button, in that order.
How do I know if my opener is in lock mode?
The command LED on the wall control keeps flashing, and the opener lights flash twice when you press a remote. Hold the LOCK button about 2 seconds to turn it off.
Do LED bulbs interfere with garage door remotes?
Some can. Chamberlain lists short range, a remote that closes but will not open, and a remote that will not program as signs. Try the remote with the LED bulbs removed.
What battery does my garage door remote take?
Most LiftMaster remotes use a 3V CR2032. The LiftMaster 895MAX uses a CR2016, and the LiftMaster 894LT and Genie GL2T use a AAA. Open the case and match the battery that is in it.
How do I reset my garage door keypad?
Press and release the learn button on the opener, enter a new 4-digit PIN on the keypad, then hold ENTER until the opener light blinks. You do not need the old PIN.
Why does my keypad close the door but not open it?
An expired temporary PIN can still close the door. Clear the memory and reprogram the keypad. A non-compatible LED bulb can also cause it.
How do I erase all my garage door remotes?
Hold the learn button for about 6 seconds, until the LED goes out. That erases all remotes and keypads, so program the ones you keep again.
Does unplugging the opener reset the remotes?
No. Unplugging the opener does not erase its programming, no matter how long it is unplugged.
Still not working? Call us.
Need a garage door fixed today? Garage & Gate Service Pros has been taking care of garage doors and openers for homeowners in Houston and the Houston area since 2012. We are a family owned business, accredited with the BBB with an A+ rating, and we have over 800 reviews from our customers. If you have worked through this guide and your remote, keypad or opener still will not cooperate, give us a call and we will take it from there.
We serve Houston and nearby areas including Katy, Cypress, Sugar Land, Pearland, The Woodlands, Spring, Humble and Kingwood.
Call 281-928-1837 or request service online.